When it comes to Arch Viz, there’s a lot of ‘out of the box’ options out there, but if you’re anything like us at MAVRiC, you probably love using and abusing free software for all it’s got. In this blog post, I’m going to discuss things you need to consider when making your SketchUp models that will no doubt influence how it looks once we’ve put it through the works.
Disclaimers
Okay a few things before we start. I’m using SketchUp 2017 for this, that way it covers some previous versions too. Then to completely debunk what I just said, I’m using Unity 2020.1.0f, that way we can access the latest XR Interaction Toolkit and Universal Render Pipeline features. For those that are experienced with game engines/arch viz you’re probably shouting at the screen at me for two reasons – Unity and URP.
Let me explain… the reason I’m using Unity for this demo is because Unreal is actually pretty good at importing your models ready for VR and the purpose of this blog post is to walk you through the stages whereas it’s not so easy. If you’re here for Unreal, check out Simons previous blog post about datasmith. Secondly the reason I’m using URP instead of HDRP is due to the ‘portability factor’; not everyone has a VR headset but a lot of people have a smartphone. “HDRP + Phone = Crash” to put it in very simple terms. Either way, this blog post is more to do with the scene itself rather than publishing to phone, headset, what have you – perhaps another blog post at a later date?
The Test Model
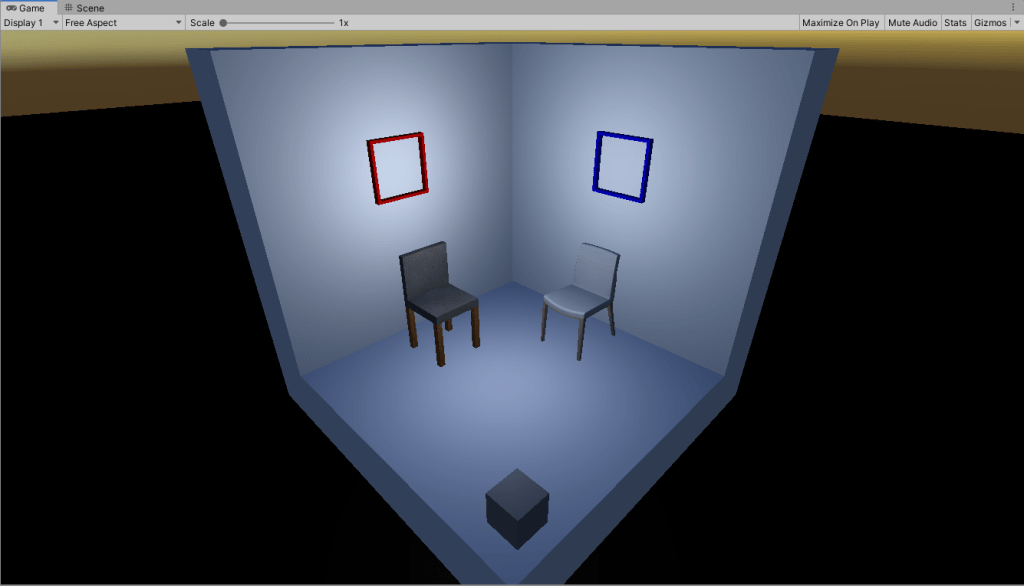
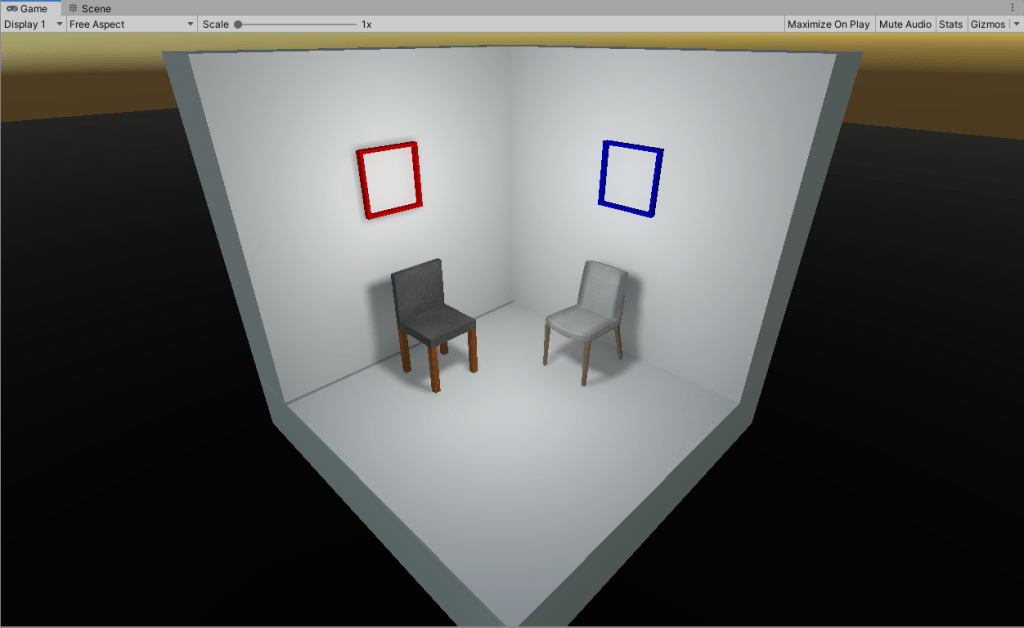
The below image is a test scene I’ve created in SketchUp.

- The left chair I have created using the basic modelling tools (how could you tell??)
- The right chair I have imported from 3D warehouse
- The red square (left) is part of the wall itself and extruded from it
- The blue square (right) is a separate component to the wall
- Its also worth noting that the chairs use textures whereas the squares use colours.
The Import Process
For this demo, I am building on top of a scene I made in a previous blog post which is already ‘VR Ready’, however for the sake of this, all you need to do is create a new 3D scene.
- Import URP: Firstly, (if you haven’t selected URP), go to window/Package manager and import universal render pipeline into your scene
- Setup URP: Right click in the assets folder, Create/Rendering/URP/Forward Renderer. Then go to Edit/Project Settings/Graphics, and add the forward renderer you just made.
- Import the model: Drag and drop the SketchUp model into the assets folder to import it.
- Edit the import settings: Click on the SketchUp model in the asset folder, under the SketchUp tab in the inspector, make sure Generate Lightmap UVs is ticked (we’ll go with the default settings for now), then under materials, extract the materials and textures into the assets folder (If your textured materials are missing your textures, you might just need to reassociate them in the inspector tab)
- Drop model into scene: Drag the imported model into the scene, if everything is pink, go to Edit/Render Pipeline/Universal Render Pipeline and upgrade project materials.
- Make everything static: In order to bake lighting, everything needs to be static, select the imported model and tick the static box next to its name in the inspector. Change the children.

Okay that was a lot! On top of that I have done a couple of things for your sake. Added a unity cube for comparisons, a point light in the centre of the model and removed the directional light.
Ready, Set, Bake!
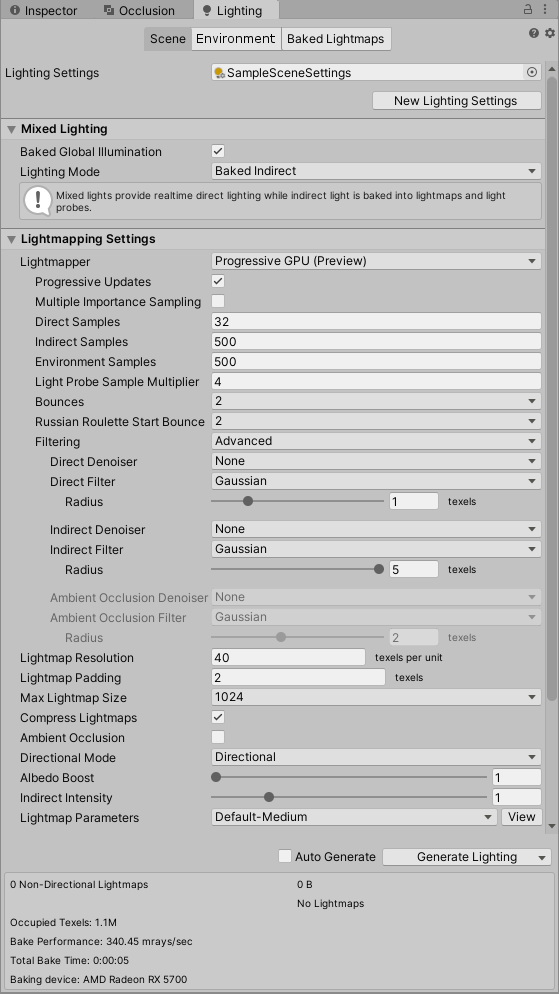
If we go to Windows/Rendering/Lighting, we can open the lighting tab. Below are the default settings I’m going to use for this first ‘bake’.
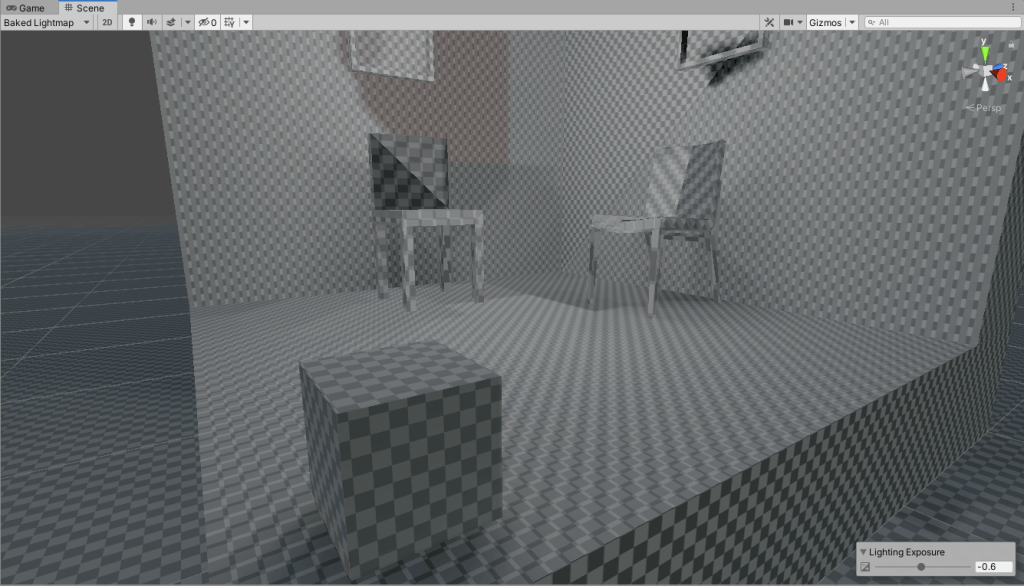
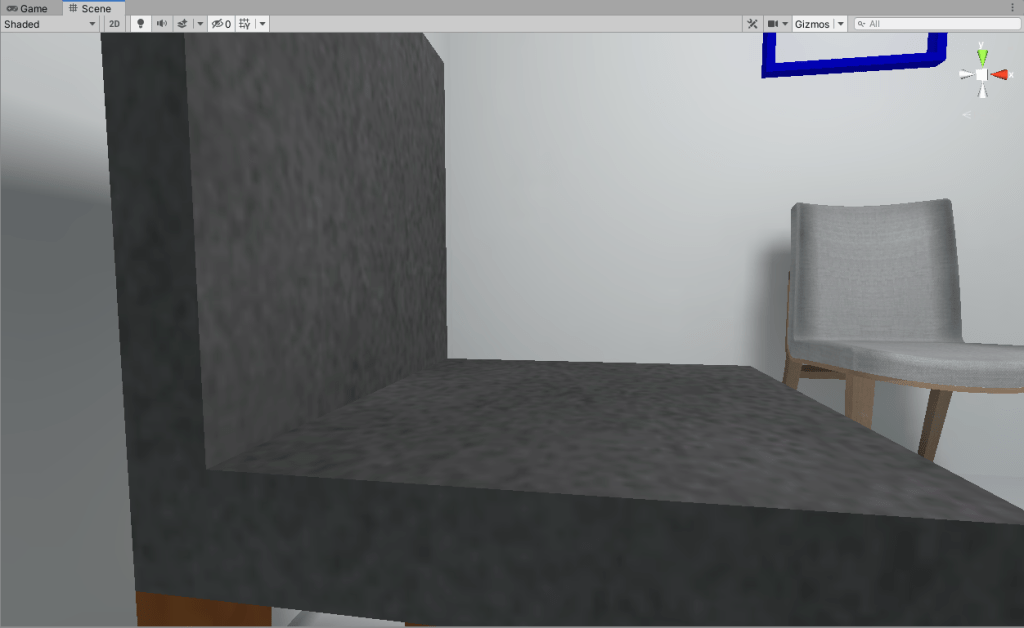
So what happens if I click generate lighting on the default settings
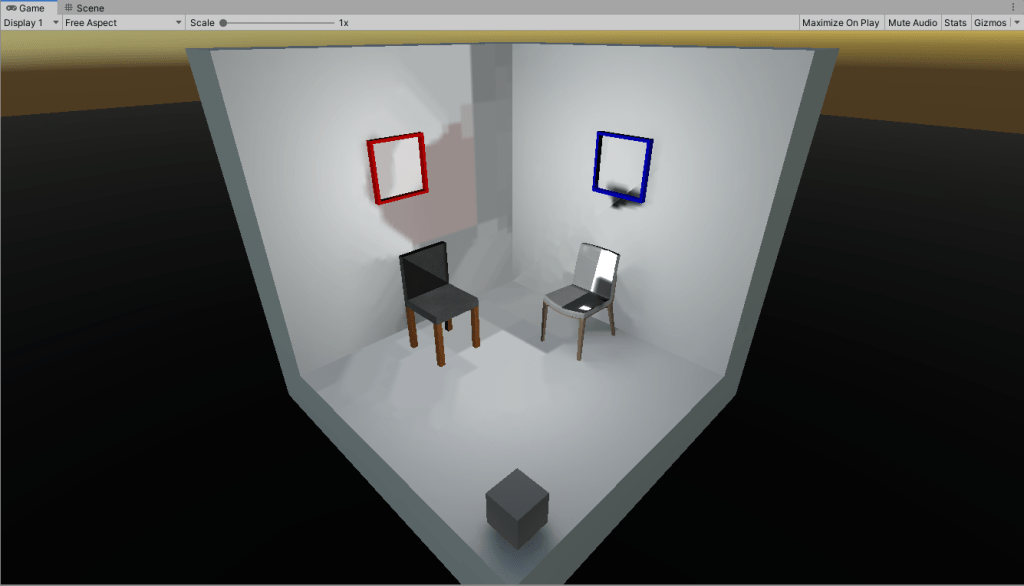
Okay… this is not what we were expecting when I said beautiful. So what’s going on here? If we go to the baked lightmap view, (top left of scene), we can see that there seems to be some multiple UV maps going on at once, this is because we have told Unity to generate lightmaps for the back of the objects we’ve drawn as well as the front. To fix this, go to your scene in import settings and untick “generate back face”, when we go back to the baked lightmap view we can see that the UVs are coming across much cleaner.
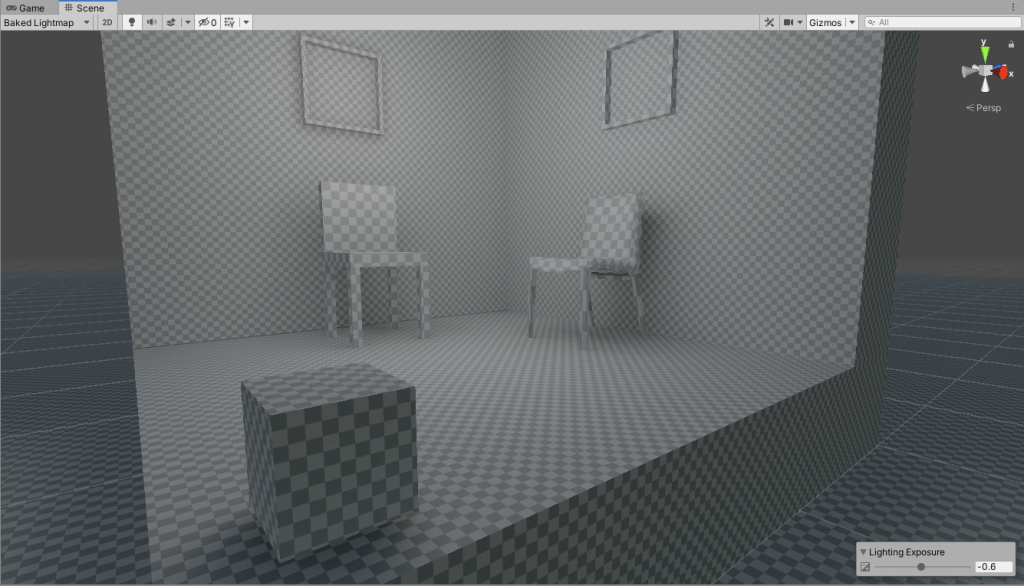
So now if we regenerate the baked data, we should get something a bit cleaner.
Ready to go right? Not before I talk you through some things to consider:
Using Components to your advantage
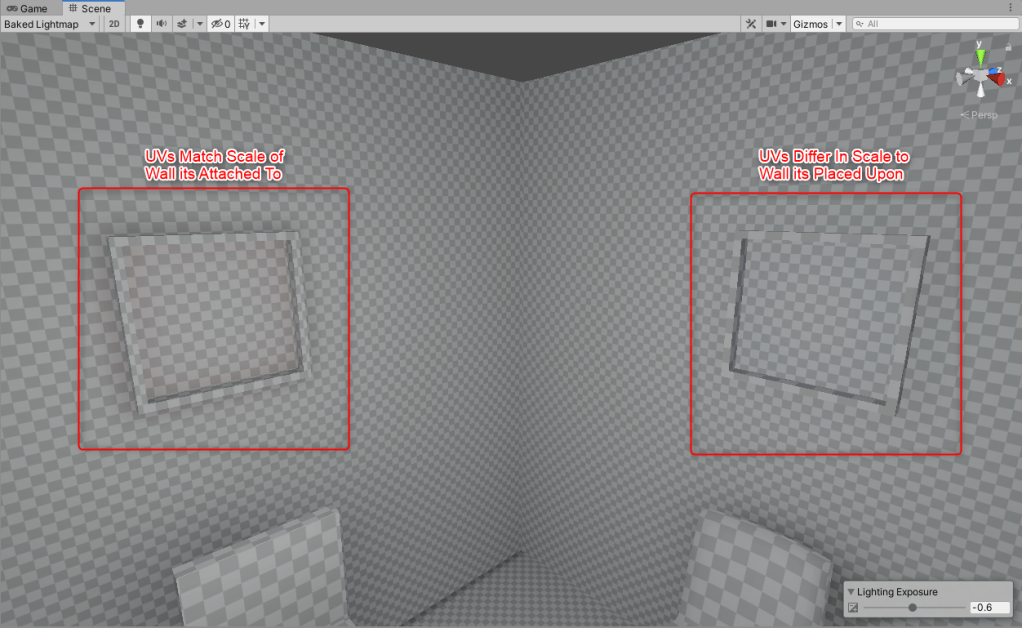
By splitting things into components, you can control the UVs of your object much easier. Notice how in the image below, the square connected to the wall on the left reflects the same scale of Us as the wall its connected to whereas the one on the right does not. This way if we applied a wood texture to the square, we can scale it up to the desired style without affecting the wall behind it.
Overlapping UV’s, should I worry about them?
In most cases, no. These are quite common for objects with a high mesh count, and its more than likely that anything from the 3D warehouse that looks half decent will have overlapping UVs. Too much of this and you can start to get what we saw earlier before we turned off the ‘generate back face’. Its about being sensible with it and knowing when to jump back into SketchUp to sort out.
The SketchUp textures look like a PS2 game
Unless that’s your goal I doubt you want your scene to look like that. You have a couple of options here, if your texture is detailed enough but flat as a pancake, it might benefit from some normal maps. Now this is a whole other blog post but for now, if you want quick, rough and ready Normal Maps that you can add to your scene check out this website.
Your other option is to purchase, or appropriately license, free online photorealistic textures for your scene, which you’ll need to import and re-associate to each material. To help you get started, this guy has some amazing free photorealistic textures to download now.
IMPORTANT: I’ve had issues before with associating textures to SketchUp objects that don’t use textures. Sometimes it only brings through the colour of the texture and no matter how much you scale it up, it stays the same. If this happens to you you’ll need to apply a texture in SketchUp and then reimport to Unity, I’m guessing this ‘tells the plane’ that its rendering a texture instead of a colour in SketchUp.
Here’s one I made earlier…
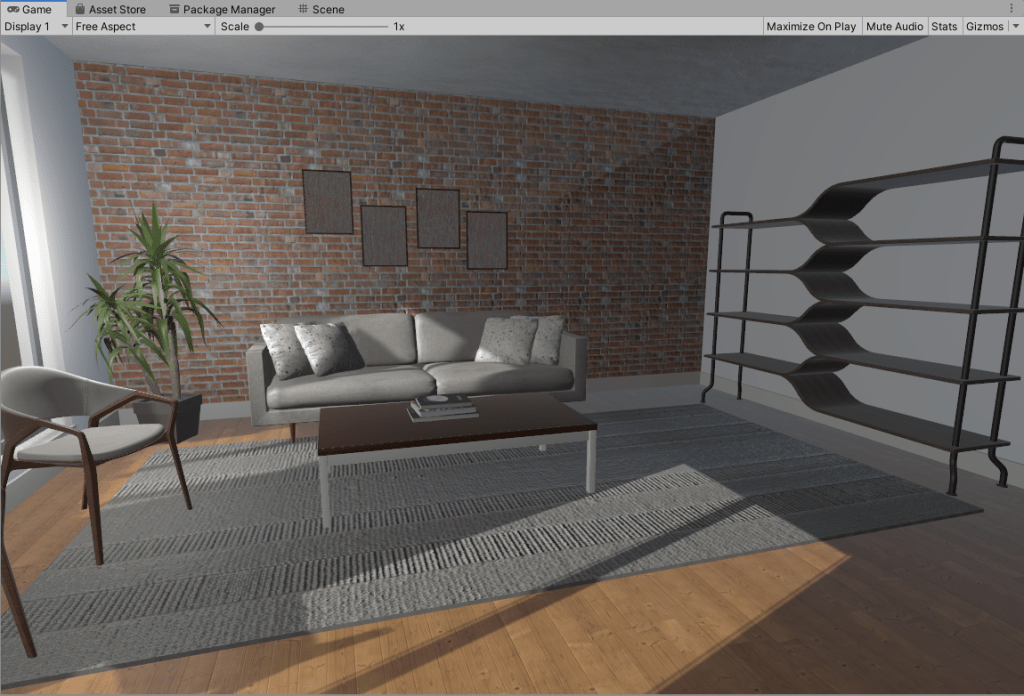
You might be thinking that this is a huge jump ahead, but I promise you it isn’t. everything in the scene above is…
- Modelled in SketchUp or taken from the 3D asset library.
- Using materials from the photorealistic library I mentioned earlier.
- Baked with the same settings as we have used in this post.
The only 2 things I have added are reflection probes and a light probe group (which are the subject of another blog). For now, all you need to know about these two things are that they are more for dynamic objects moving around the scene. Which for your static Arch Viz needs, won’t be much of a problem. The below image shows what its like with them turned off:

Conclusion
We’ve been through a lot in this! If you’re in a rush, here’s the key things you need to know:
- Make sure you turn off ‘generate back face’ when importing the SketchUp model, or get horrible lightmaps.
- Use components to leverage your control of the lightmaps when it comes to the ‘beautifying’ stages. As a rule of thumb, different material, different component.
- Using Unity’s URP enables you flexibility to port this to mobile devices that struggle with HD rendering. If you’re presenting this on a desktop or want to produce rendered images, use HDRP.
- Want to understand lighting in more detail? Unity have done a great video on using lighting with URP in your scenes.
Hope this helps… my recommendation to you, experiment! Play about with a project you’ve modelled before, how could you have modelled that project differently to make it easier to ‘beautify’ at a later stage? Let us know what you find out!

Spot on with this write-up, I absolutely feel this web site needs a great deal more attention. I’ll probably be back again to read more, thanks for the advice!