
Game engines are complex bits of kit, and a lot of the time we’re trying and testing things out to see what works best. Sometimes, the things we do in these game engines can’t be undone, or all that time we spent working things out was for nothing and now we have to go and manually change everything back. Thankfully there’s a solution! GitHub, is a provider of Internet hosting for software development and version control using Git. Git allows us to capture versions of our application to track, revert and merge changes in our app.
In this blog post, I’m going to talk you though the setup procedure for GitHub and how to use it for game engines like Unreal and Unity.
Setup
Firstly we’re going to sign up to GitHub. Go to www.github.com and hit the sign up button. If you’ve already got an account you can skip this bit.

There’s also a couple other things we need to download:
- Git – This is the bit of kit that manages all your version control, GitHub is just a visual, user-friendly way of using Git.
- Git Large File Storage – For us folks working in game engines, it helps with our large images and 3D objects.
- GitHub Desktop – This is what we’re going to be using to manage all of our changes, etc.
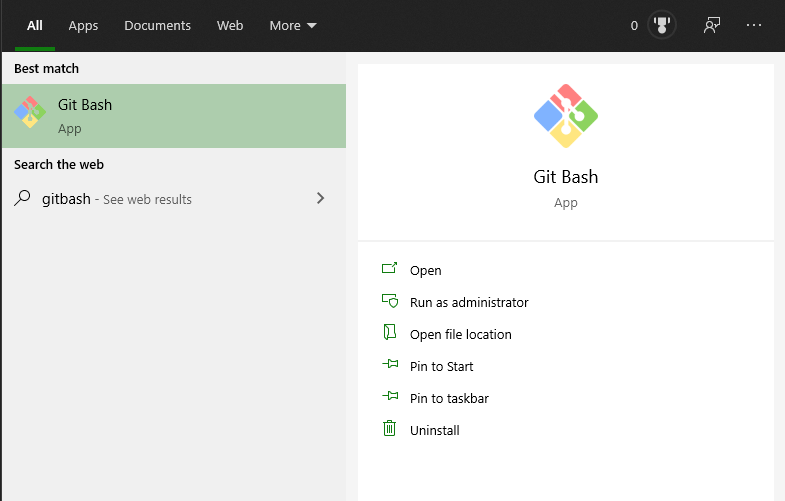
Once all of these are installed, we need to initialise Git LFS to be able to use it. To do this, find GitBash on your computer/laptop and open this up. Copy and paste the below git command into GitBash (note: you’ll need to use shift and insert to paste).
git lfs install
Lastly, make sure you’re signed in to the GitHub desktop app as the repository we’re about to create will appear here.
Creating a repository
Now we’re going to create a repository. A repository is a common storage area where we host our application. If you’ve used one drive or iCloud, it’s a similar principle – there’s a folder on your PC that as you save/edit, and as you do this, it makes changes to the file saved in the cloud. The difference with GitHub compared to storage solutions like these is that it can be cloned to different users computers and tracks all the changes we are making, not just a high level ‘save’. Also, it’s free!
So how do we create a repository:
- Go to github.com and click ‘new’ next to repository
- Name the repository and give it a description, it doesn’t have to be the same name as the actual application.
- Select private or public, it used to be that you’d have to pay to make things private, now it’s free for all!
- Select whether you want to add a .readme file
- Select unreal or unity for your .gitignore.
- Click create!
Let me back up a moment, there’s two new things here that we probably need to talk more about, the .readme file and .gitignore file. The readme file is like any other readme file. Put simply, it’s a bit of text that tells us more about the application. Readme files are the subject of another blogpost and really if you are getting started with GitHub, I wouldn’t lose sleep over this. If you are interested in how to write great readme files, there’s some great advice here.
The .gitignore file is more important… Unity and Unreal spits out a lot of jargon and irrelevant files that we’re not interested in, .gitignore tells Git what to ignore (you don’t say!). The reason this is important is because any changes we save need to be legible and easy to interrogate later down the line.
Cloning a repository
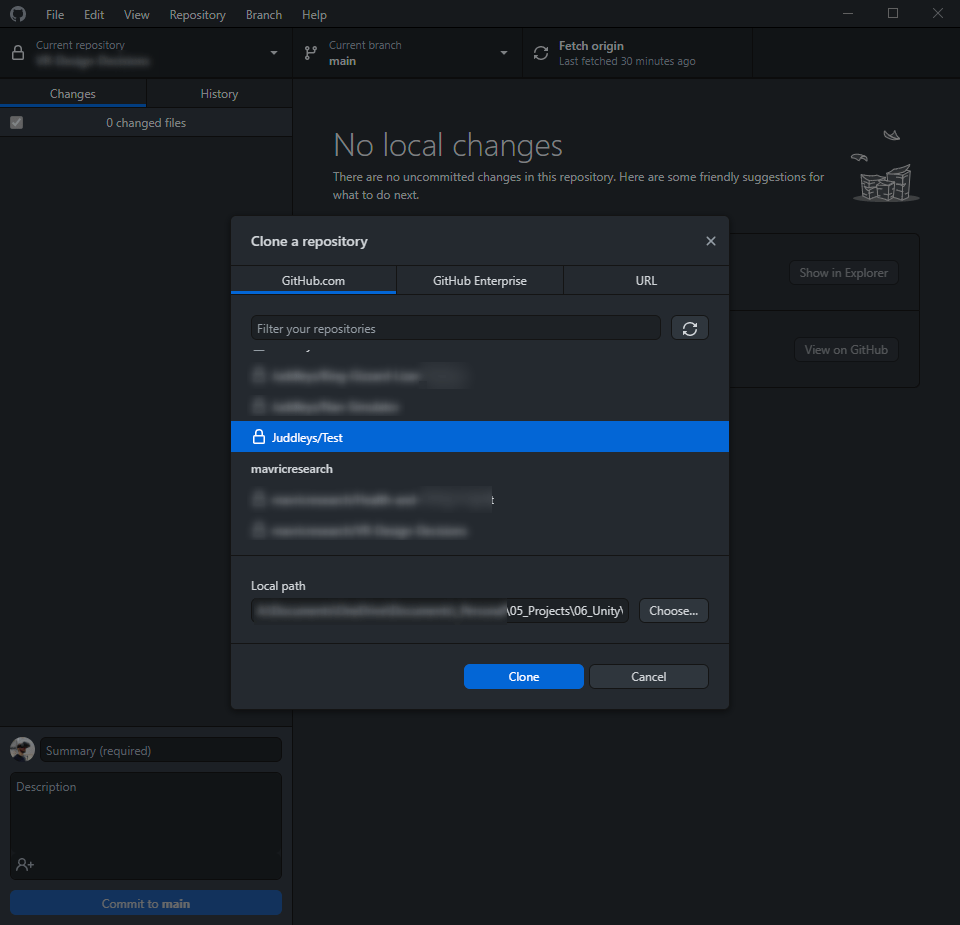
So now we have a repository created in the cloud, we need to ‘clone’ this repository to our local PC. To do this, go to your github desktop application and click File/Clone Repository. If you’ve successfully linked your account you should see it appear in your repositories. If you can’t see it, go back to your online repository and copy the git URL, you might be able to locate it that way instead! Lastly, browse to a location you want to create this repository and click clone.
Create a project
Now we need to start creating the application, so as you would normally, open up the Unreal Editor or Unity Hub menu and create a new project. The only thing of importance is that you create this project in the same location that you have cloned your repository. Once you’ve created a new project, you should start to see some changes come up in the GitHub desktop.
If there’s more than 100 changes, there may be something wrong with the .gitignore. This is likely because the .gitignore is looking in the wrong location. Often with Unreal and Unity applications, another folder is created when starting the project. Although Git can read this folder, the gitignore cannot. So we need to go and fix that now. To solve this, go into the gitignore and add the file name before any items that have a “/” in front of them.
The example below is for unity but same principles will apply to unreal. Immediately below is what the .gitignore will look like when you open it
# This .gitignore file should be placed at the root of your Unity project directory
#
# Get latest from https://github.com/github/gitignore/blob/master/Unity.gitignore
#
/[Ll]ibrary/
/[Tt]emp/
/[Oo]bj/
/[Bb]uild/
/[Bb]uilds/
/[Ll]ogs/
/[Mm]emoryCaptures/
So by adding the “projectname/” before the directory lines, the .gitignore can find our file, in our case our project name is “Test”. If your application folder is within yet another folder, you would then also add this folder directory as well, for example “folder1/test/[Ll]ibrary/”.
# This .gitignore file should be placed at the root of your Unity project directory
#
# Get latest from https://github.com/github/gitignore/blob/master/Unity.gitignore
#
Test/[Ll]ibrary/
Test/[Tt]emp/
Test/[Oo]bj/
Test/[Bb]uild/
Test/[Bb]uilds/
Test/[Ll]ogs/
Test/[Mm]emoryCaptures/
Basic Version Control
Believe it or not, you’re all set up! In order to start using Git, you need to learn some git terms, as taken from the GitHub Glossary:
- Push – To push means to send your committed changes to a remote repository on GitHub.com. For instance, if you change something locally, you can push those changes so that others may access them.
- Pull – Pull refers to when you are fetching in changes and merging them. For instance, if someone has edited the remote file you’re both working on, you’ll want to pull in those changes to your local copy so that it’s up to date. See also fetch.
- Commit – A commit, or “revision”, is an individual change to a file (or set of files). When you make a commit to save your work, Git creates a unique ID (a.k.a. the “SHA” or “hash”) that allows you to keep record of the specific changes committed along with who made them and when. Commits usually contain a commit message which is a brief description of what changes were made.
- Merge – Merging takes the changes from one branch (in the same repository or from a fork), and applies them into another. This often happens as a “pull request” (which can be thought of as a request to merge), or via the command line. A merge can be done through a pull request via the GitHub.com web interface if there are no conflicting changes, or can always be done via the command line.
- Branch – A branch is a parallel version of a repository. It is contained within the repository, but does not affect the primary or main branch allowing you to work freely without disrupting the “live” version. When you’ve made the changes you want to make, you can merge your branch back into the main branch to publish your changes.

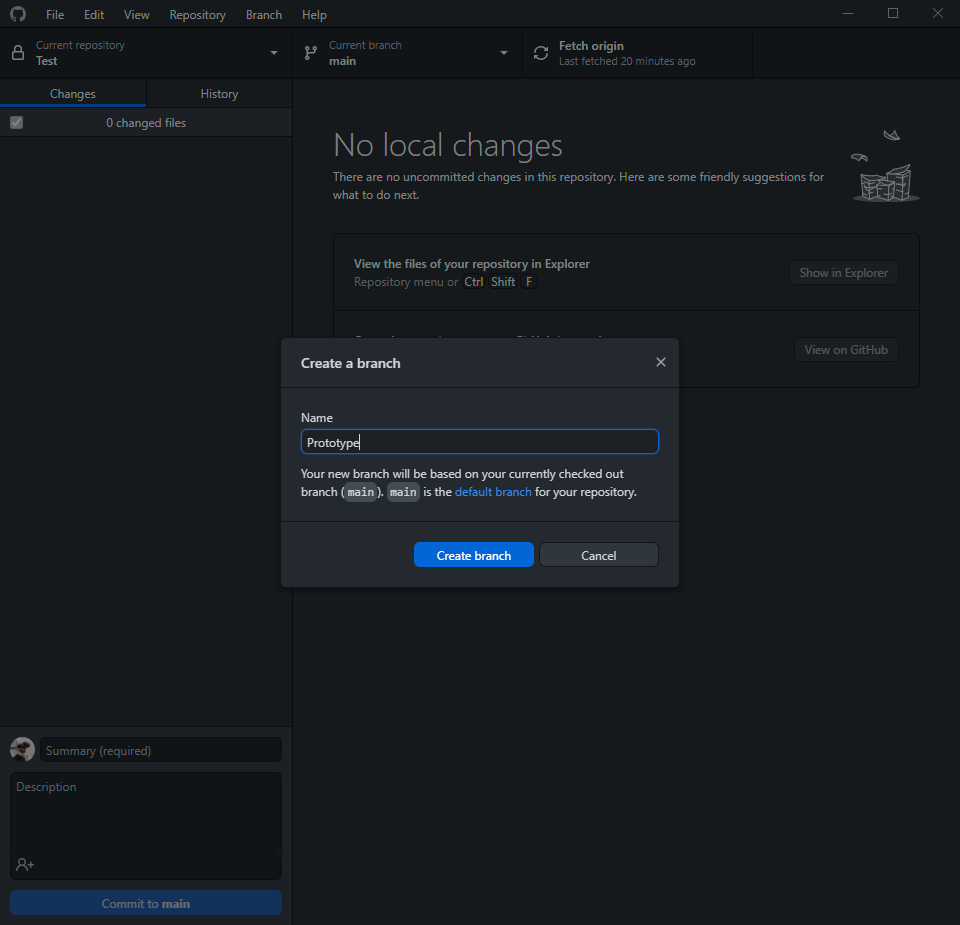
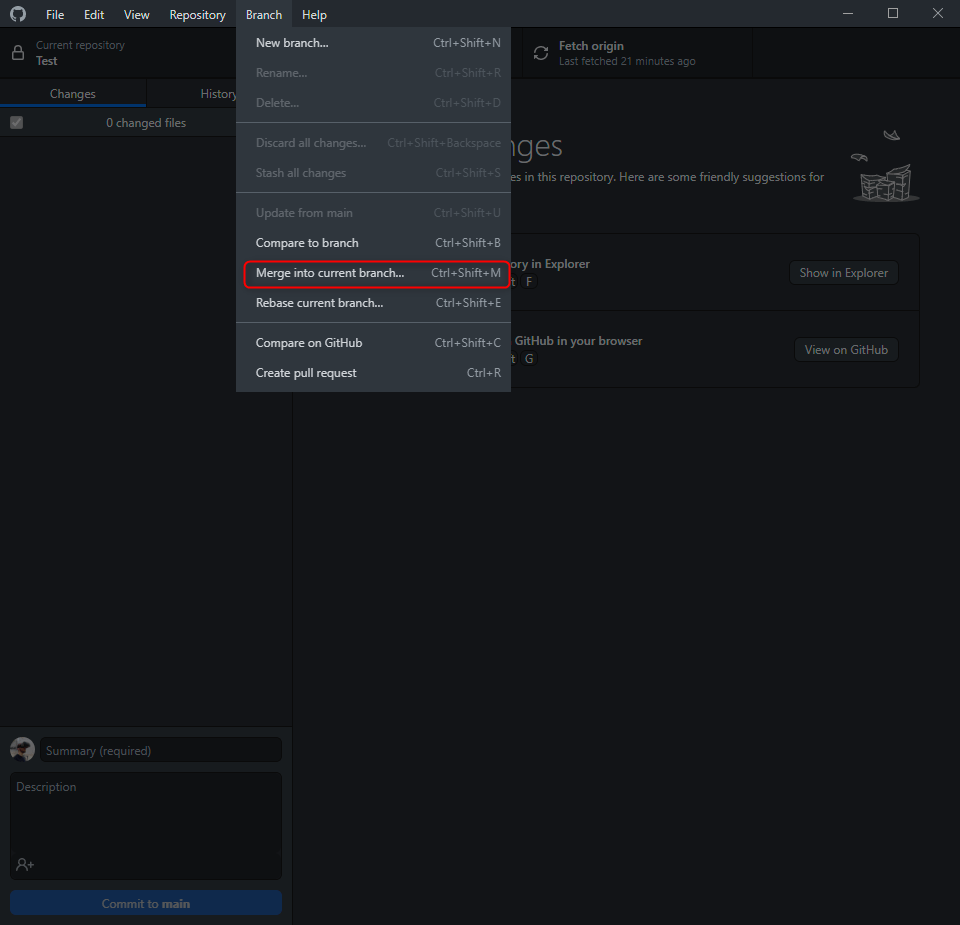
Now if you’re getting familiar with using this, you may just want to keep pushing commits to the main branch which roughly translates to “Saving a version of your application to the cloud”. You can, however, setup new ‘branches’ for prototyping, meaning that you can setup a branch for as many things as you need and each one won’t affect the other until you decide to ‘merge’. Its standard practice to have the latest working version of your application pushed to the ‘main’ branch. I.e. you shouldn’t have any prototyping or experimentation in your ‘main’ branch. When you want to merge, go to the branch you want to merge stuff into and click branch/merge into current branch.
Top tip
Unreal has a built in link to Git which means you can publish versions within the unreal editor without having to leave to open the GitHub Dekstop client. To do this, click on the source control within the banner at the top. In this menu, select Git; everything should populate for you if you installed Git in it’s default location, otherwise you may need to browse to it. Remember we need Git not GitHub!
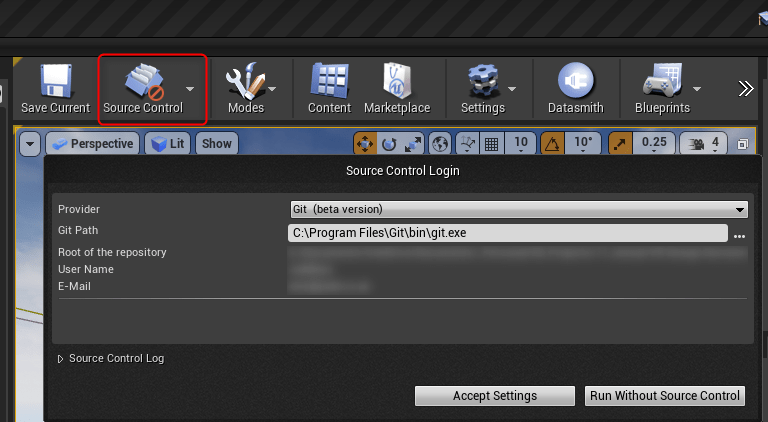
Click accept settings and voila, you should be able to make commits within github.
Conclusion
So that’s that, be sure to have a play about with GitHub, used wisely it can be a very powerful tool. At MAVRiC, we use Git to allow multiple people to work on the same project, but personally I have also found it helpful for syncing between my own computers. Especially with the remote working we’re doing at the moment; if you go into the office and create a nice ArchViz model, by using Git you can send this back to your computer at home and carry on using it when you’re working from home the next day!
