
If you’ve been following our series of blog posts, you may have come across our ‘how to’ guide for Unity’s input system. Thanks to OpenXR making extended reality devices easier to design for, more and more development platforms are adopting the initiative and expanding their input library.
In this post, similar to our Unity guide, we’re going to look at how Unreal Engine tackles its input system for VR experiences. Mastering this can really help leverage your portability to different devices and make your interaction and locomotion programming a doddle to manage.
Setting up a VR project
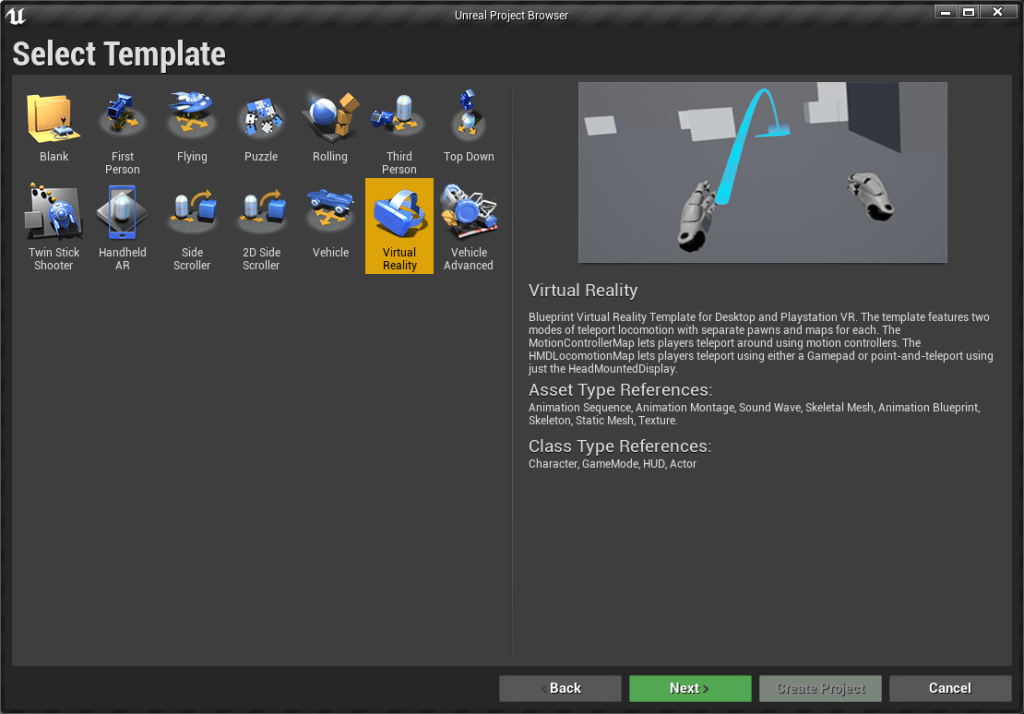
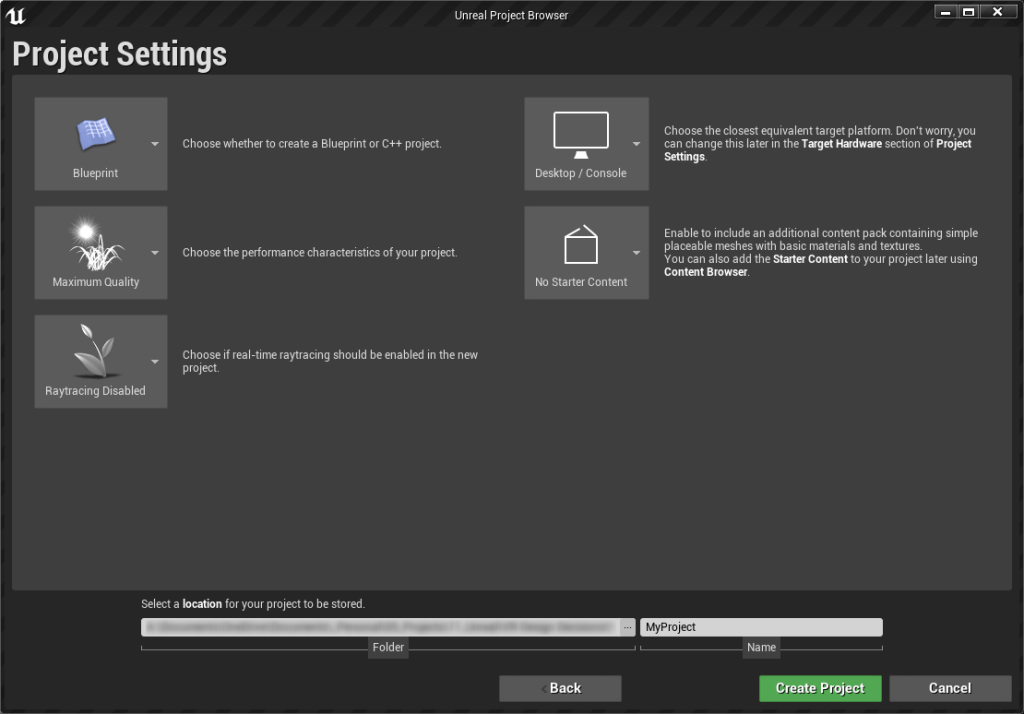
I’m going to assume you have unreal engine installed already. If not, you can grab a copy for free here. The setup is fairly straight forward. Once you have it installed, we’re going to go ahead and make a new project (for this we’re using 4.26.1). The benefit of using Unreal for VR development is that a lot of the work is already done for you! On start-up, under the blueprint tab, we can select the VR template to work from. We don’t need any additional content at this stage and we can keep raytracing disabled.
One you’ve created a new template, you should be dropped in to one of the VR maps. The template comes with 3 of these maps that explain more about how VR works in the Unreal Engine. In general, for the stuff we’re going to produce, the locomotion map is your best bet, and that is what we’re going to use for this setup.

Setting up OpenXR
Simon has already talked you through some of the steps for setting up VR in Unreal, we’re going to follow a very similar path except we’re going to tick some different plugins, specifically the OpenXR route that enables us to do some cross platform development. Go into Edit/Plugins and click the virtual reality tab. We want to tick the OpenXR plugin and also the Oculus OpenXR plugin if we are using an Oculus headset. Restart the editor and plug in your headset.

You should see a button under the play tab called VR preview, if you forgot to plug in your headset or you haven’t set up your headset to talk to your PC yet, you may find that this is greyed out. Hit that button to enter VR.

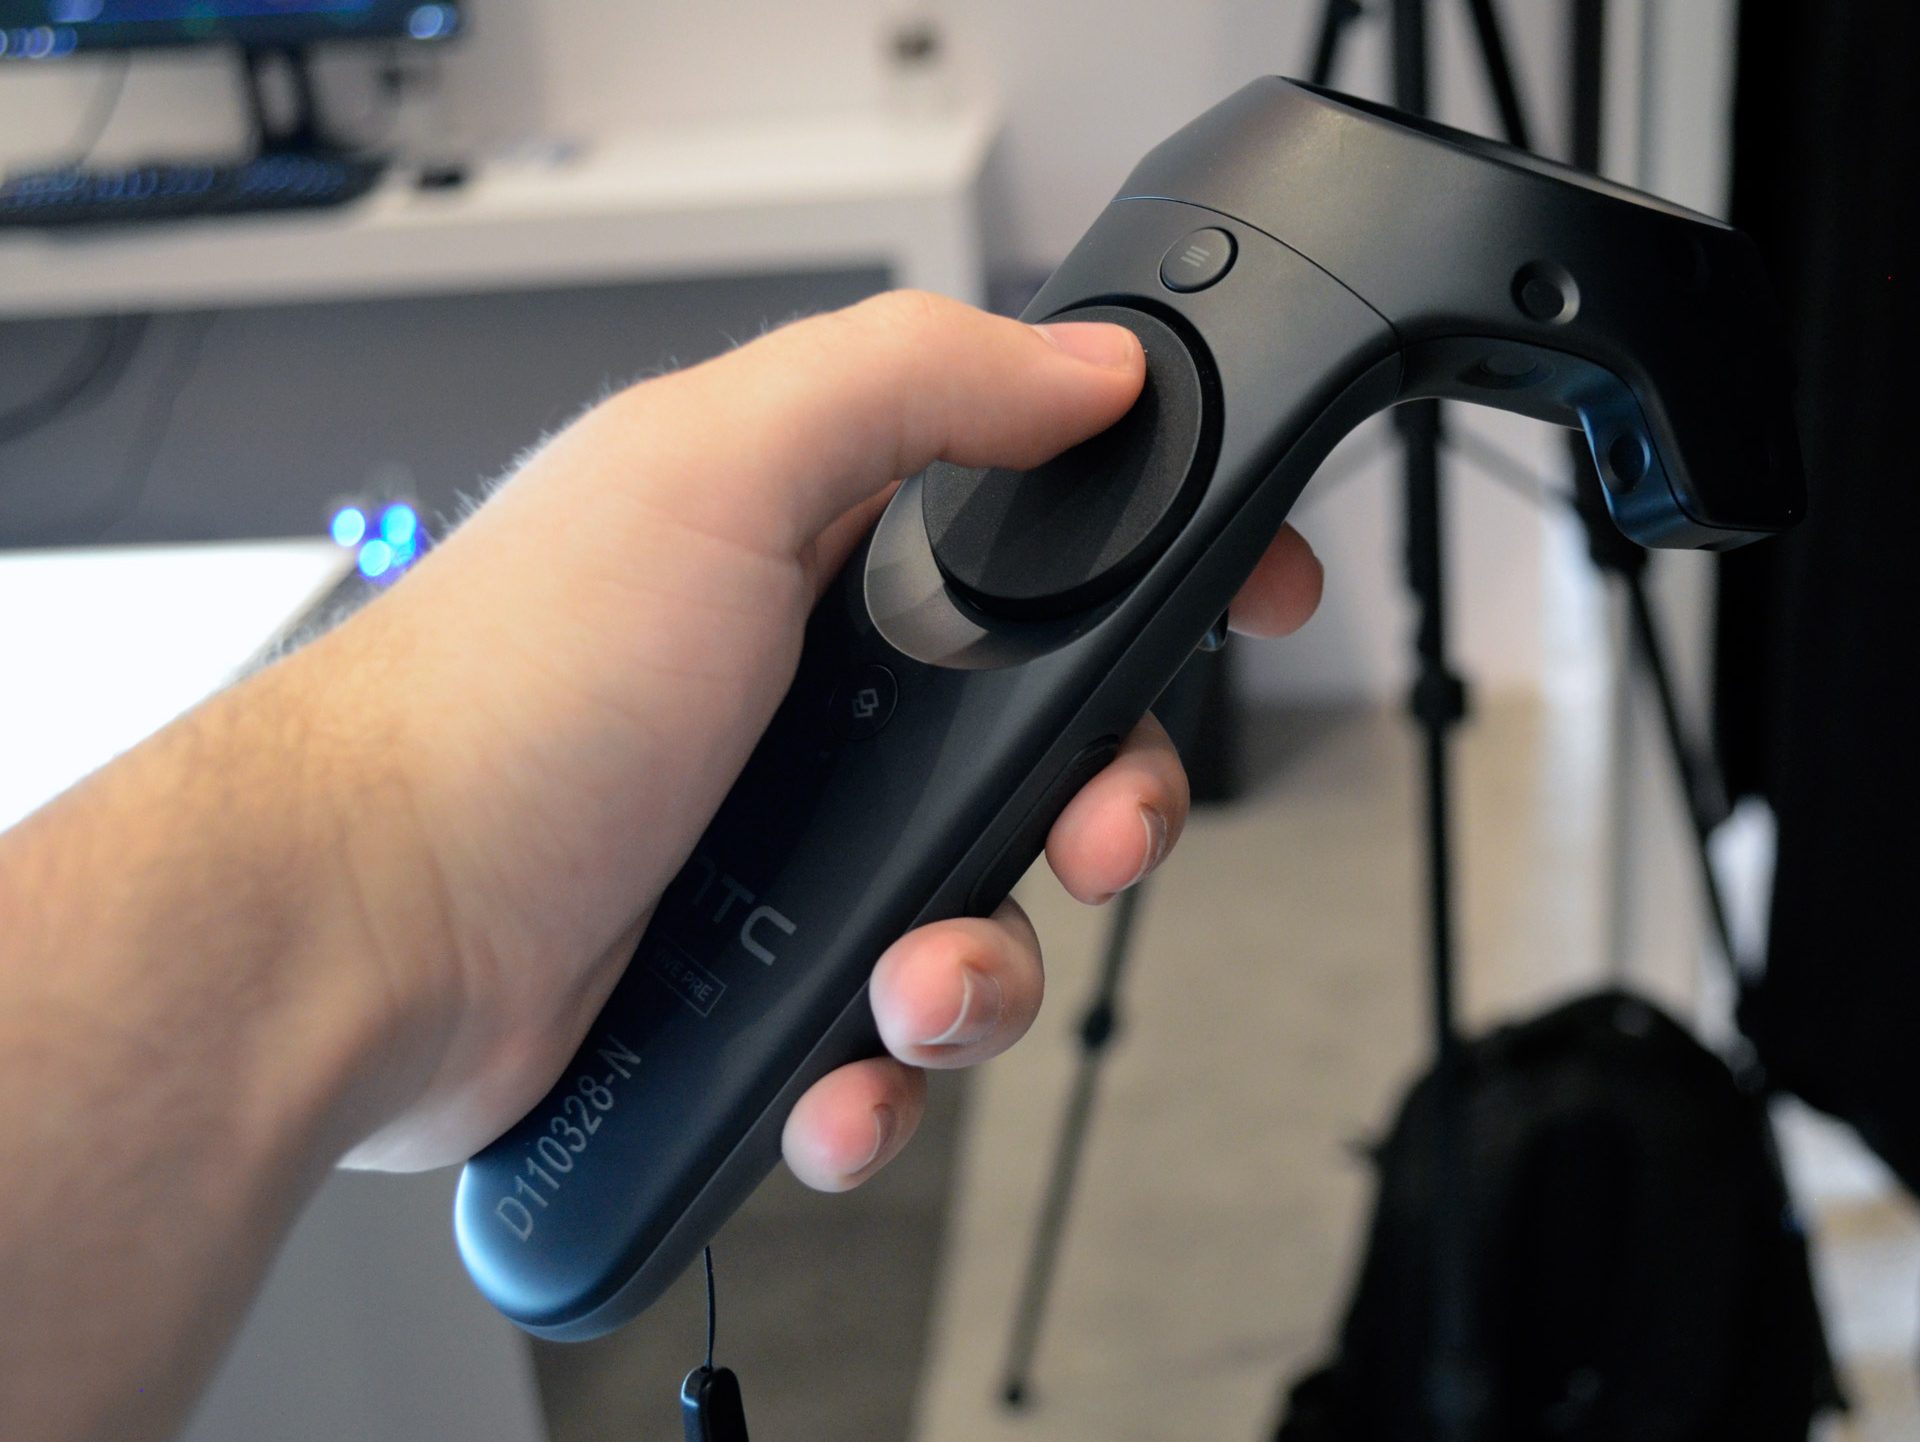
Oculus quest users, I want to ask, are your hands tilted too far back towards your body? If so, let me know because they shouldn’t be! My understanding of this is that the motion controllers (Vive) are held almost as a remote control as opposed to a pistol (like oculus), which means their tilt is much greater and causing rotation inaccuracies on other controller types. OpenXR in Unreal is in a beta version at the moment so I’ll let this slide, but hopefully this gets fixed.

There’s two workarounds for this, one is to manually adjust the VRPawn blueprint to add a rotation when oculus or ‘pistol like’ grips are used, or if you’re lazy/not used to blueprints like me. Use the Oculus VR plugin that Simon has mentioned in his previous blog post, then when its time to port to the other headsets, switch back to the OpenXR plugin.
Before we move on
Something I forgot to mention in our last post was the translation between devices. Not all of us have the luxury of testing on multiple devices so it’s important to know what each button translates to on other devices. This is important because controllers like the Vive motion controllers have a touchpad as opposed to a joystick. If your interaction is heavily joystick based, this might be a different experience on another device.
Although we’re focusing on Unreal in this blog post, Unity has a great table that highlights this translation between devices well. You may have noticed how hardware like the Oculus Quest and Microsoft Mixed Reality devices have buttons that are not on other controllers. In most cases the translation is seamless, but it’s worth bearing this in mind!
The input system
So we’ve got our project setup, and hopefully you were able to jump in and out of a VR preview. When you push some buttons on your controllers in this preview, did anything work? If so, great! We’re about to find out why it worked. If not? Don’t worry! We’re about to go and manually fix it.
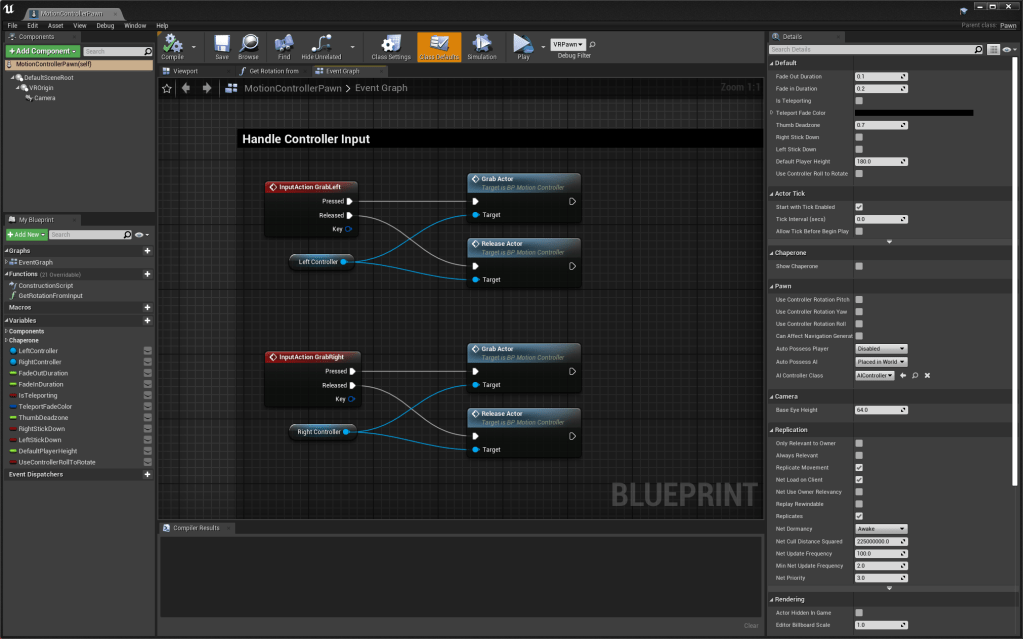
Likely the reason for your buttons working or not working is down to the setup in the Input system. Before we jump into the input system, lets open the map’s VR pawn. This is where things like teleport and grab object are processed. Let’s take a look at the GrabLeft node. When triggered, this notifies the Grab Actor to start grabbing an object that is interactable, but how are we triggering this input?
Come out of the blueprint and go into Edit/Project Settings/Engine/Input. Under input there is an action mapping drop down list which is where we can add these interactions that are being called in the blueprint. If everything is working well you should see a list already there with all the different controllers on. If there isn’t anything, it’s just a case that you’ll need to add these on by clicking the small plus button.
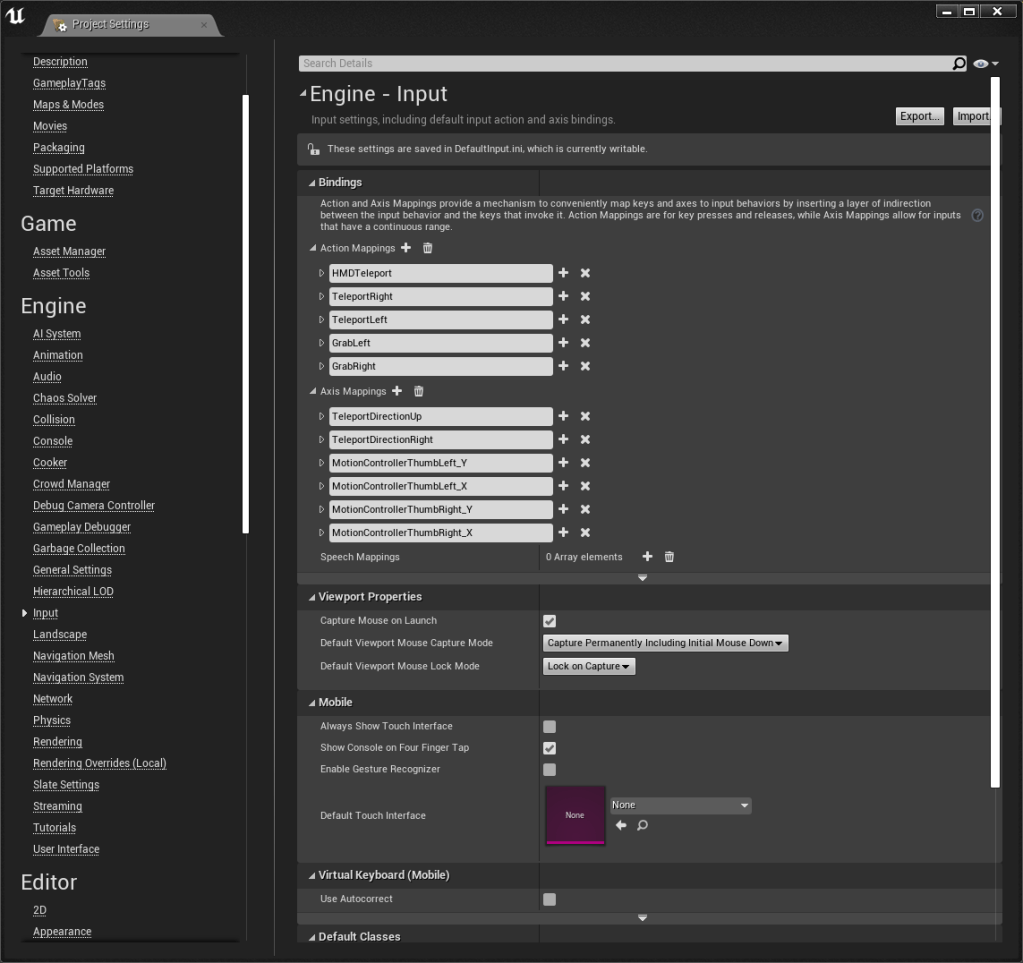
Its important to note that the text in these boxes should be the same as that in the blueprint, so for grab left we’d need to add a ‘GrabLeft’ text input and associate our buttons below it.

Conclusion
That is pretty much it! It is here that you can add your own inputs/change your inputs to whatever you want. If you’d rather teleport with a joystick instead of a button, all you’ll need to do is swap out the input for each controller type. This is the beauty of OpenXR and that seamless transition from device to device. If you go further into this, you’ll notice that OpenXR also allows headsets to be compatible with traditional controllers as well. This is common in VR Supported experiences and OpenXR has helped accelerate that.
How did you find setting this up, was this easier or harder than you thought? Did you come across any problems? Let us know!
