
Are you someone who provides a service or product where presenting customisability or options are of importance? If so, “variant sets” are a need-to-know feature of the Unreal Engine.
This is part one of a 3 part mini-series looking into Unreal’s ‘Variant Sets’.
Tell me more…
A variant is a configuration of one or more “Actors” and the properties they possess, the configurations define what variables and functions are activated. These variants are organised into groups called “Variant Sets” which can be enabled via the Variant Manager.
🎓 Actors are elements in the level (scene) which typically include: geometry, triggers, lighting, sound and effects.
Each variant can be as simple or complex and numerous as you like. In a nutshell, we are toggling off or on any given property on any given Actor. Each Actor will have its distinct set of properties relative to its class, a static mesh actor (geometry) is typically going to have properties such as “visibility” or “cast shadow” which bring with them variables that can be controlled through the variant manager as part of each variant.
This automatic toggling on and off of properties is applied first and foremost as part of your project workspace, but can also be made to come into effect during runtime applications. In following posts we’ll be looking at how to get variant sets working in runtime and then follow this up with how to get it working in VR.
So, now you’ll likely understand why Variant Sets can provide a multitude of possibilities not just your workflow but also when it comes to presenting your service/product/ideas. This car configurator video is one example of variants “doing their thing” in runtime… Suddenly my mind is cast back to Poorang’s discussion on his fascination with mass customisation.
Start Here
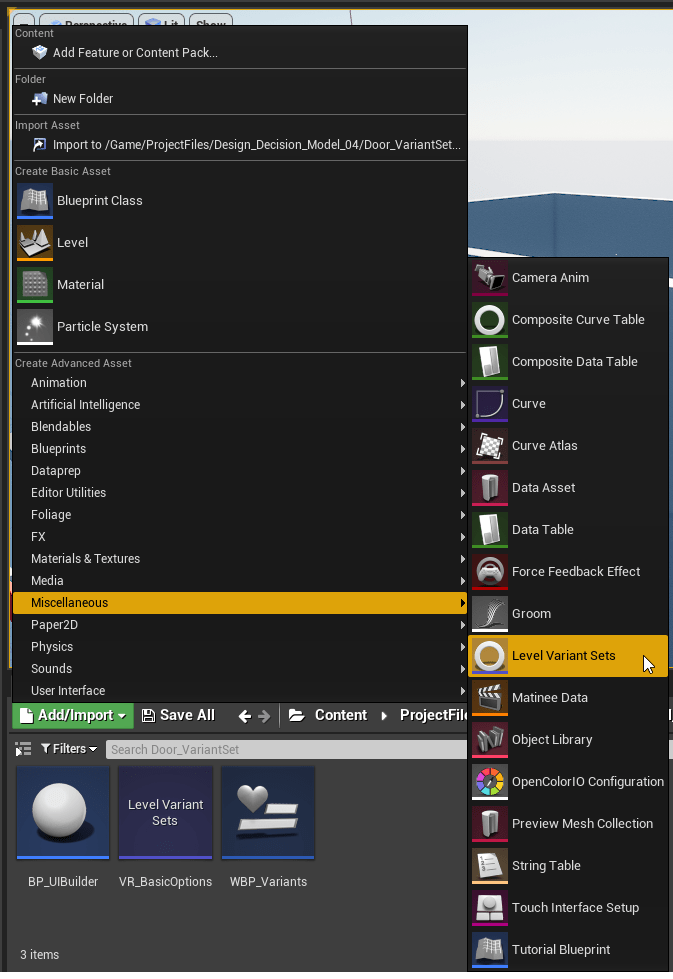
First of all, we are going to be using the ‘Variant Manager’.
❕ Check if you have Variant Manager enabled by going to Plugins > Variant Manager. AEC project templates will have this plugin enabled to begin with.
In project browser go to ‘Add New’→ Misc.→’Level Variant Sets’. Give this a specific name you will remember. Now, with this created, remember to drop the Level Variant Set into your viewport for it to come into effect. If you forgot this minor detail you will end up scratching your head for hours wondering why it’s not working!
Next, open up the Level Variant Set.
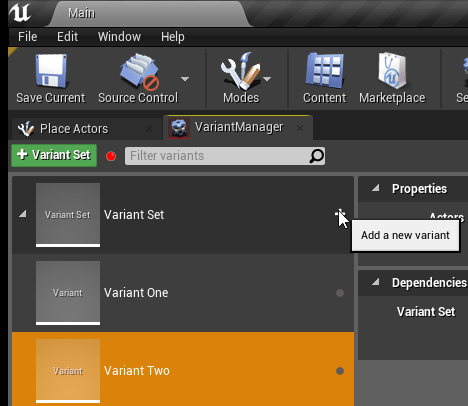
- 1) Click the (green) ‘Variant Set’ button. Give this set a name specific to the category of associated variants that are to be customised. E.g. Doors.
- 2) Click ‘Add a new variant’ within your newly created Variant Set Catagory. Give each subsequent variant a name, e.g. Door 1; Door 2 (red); Door 2 (blue)…

- 3) Next, from the World Outliner panel containing all your Actors, add each Actor that will be involved with the specific variant to be controlled.
- 4) A list of properties will open up. Select the property variables that apply to your use case. In most cases this will be the ‘visible’ variable for simple on an off switching.
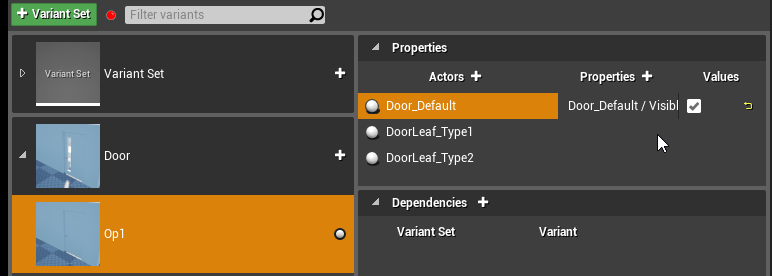
Now for the all important example: Lets say you want to choose a between a red door and a blue door. Drag and allocate BOTH your ‘Blue Door’ and ‘Red Door’ Actor to the variant you named Door 2 (blue). Here you will enable visibility for the blue door, but just as important you will be disabling visibility of the red door Actor; both are to be contained within this single variant. Then, repeat for the variant called Door 2 (red), inverting the enabled/disabled values from the previous. To save some time, duplicate the blue variant and tweak the settings.
Finishing Touches
To make things easier to navigate and add a little polish to the UI we’re going to add a thumbnail image to the Variant Set and Variants.
In your viewport, navigate to the Actor that has been modified, zoom in and try to capture the essence of what is being changed. E.g. Focus on the blue door for the blue door variant. In variant manager, right-click on the variant > Thumbnail > ‘Set from Viewport’.
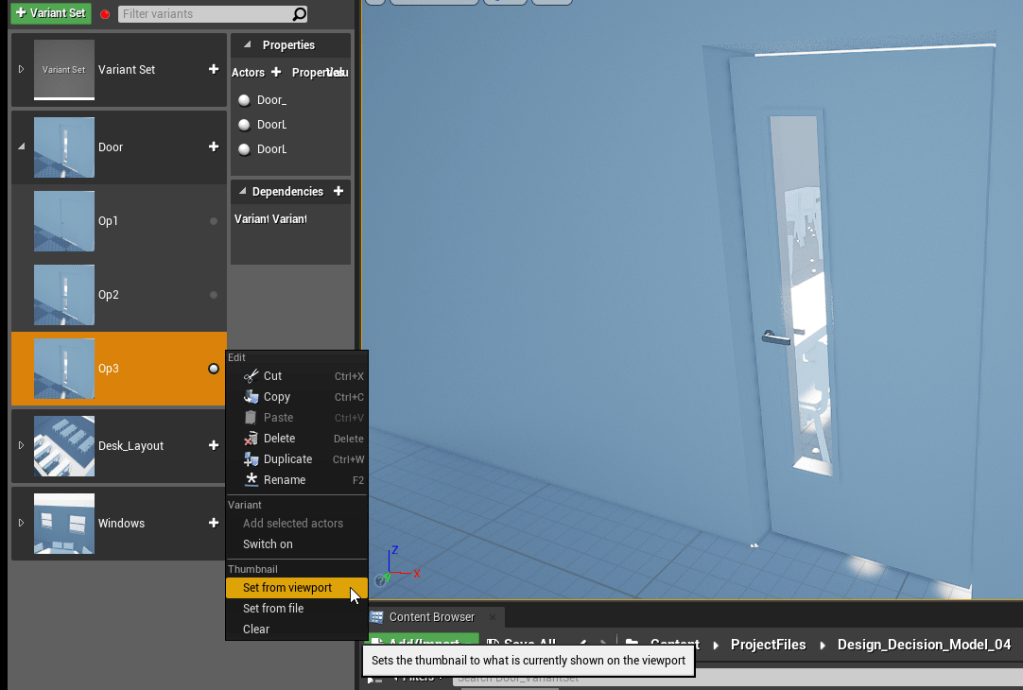
This will capture an image and apply it to your Variant’s UI. A very nice touch! For the obsessives out there you can attach images from outside of UE
Join us in a few weeks for Part 2 on how to use variant sets in runtime!

One thought on “UE4: Start Using ‘Variant Sets’ Today”